Step 1: Choose Your Website Platform
You must choose the platform on which to develop your website before you can begin to build one.
By “platform,” what do you mean?
Well, the majority of websites were made with HTML (code), CSS, and PHP back in 2005 when I first started working in web development. Each of these was time-consuming to learn and challenging to master.
The majority of people still believe that creating a website from scratch is challenging or needs extensive technical and design expertise, however this is no longer the case.
By 2022, everyone can create a website thanks to content management systems (CMS) like WordPress.
Instead of designing a website from scratch using HTML, PHP, and other computer languages, a CMS (or website building platform) is a user-friendly platform for creating webpages and managing your own online content.
Popular Platforms for Building Websites in 2022
I gathered some current information from W3 Techs and BuiltWith to better understand which content management systems are the most popular.
Simply glance at the graph below:
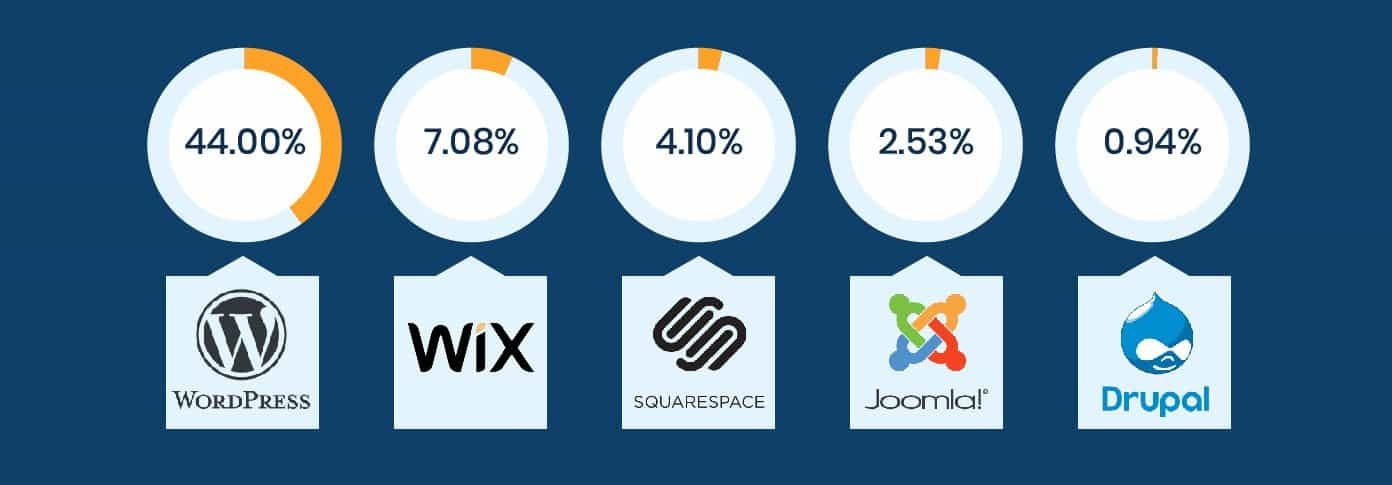
Source: BuiltWith
As you can see, WordPress is used to power about half of all websites on the Internet. But what distinguishes them from alternative choices?
Why WordPress instead of a website builder?
1. It is Free (no recurring subscriptions, open-source)
It costs nothing to download, install, or use WordPress, in contrast to website builders or web design tools. It was created for web developers, and a sizable developer community has created lovely free themes and templates to make it simple to get started right away.
2. It is very adaptable and user-friendly.
You already know how to contribute your own material if you know how to use Google Docs. From small company websites to e-commerce sites, WordPress can be quickly expanded with free add-ons to accommodate almost any site you can think. You may add contact forms, subscription forms, picture galleries, storefronts, and other features to your website using WordPress “plugins.” And everything is rather easy.
3. Your website is “responsive.” i.e., it will function on both smartphones and tablets.
The website you create will be responsive right away and look fantastic on all smartphones, tablets, and other mobile devices. For that, there’s no need to engage a web developer.
4. Support from the local community
It’s simple to locate prompt assistance when you need it because so many individuals (webmasters, small-business owners, and bloggers) use the platform. You may hire one of the thousands of WordPress developers here, or you can obtain free assistance from their support page.
Are there any reliable WordPress substitutes?
Although there are many alternatives, like Wix, Squarespace, Drupal, and Joomla to mention a few, none of them have proven to be as adaptable and scalable as WordPress, which is why it is the most popular option to create a website.
We do suggest using Shopify if you’re wanting to start an online business. It is an easy-to-use website builder specifically designed for creating online stores. Visit our Shopify guide to get started by following our step-by-step instructions.
Check out my instructions for building websites using Drupal, Joomla, HTML5, and website builders if you decide for whatever reason not to use WordPress.
Step #2: Find a Domain Name and Host
There are two things you’re going to need in order to launch a new website:
a website address (a web address like yoursitename.com)
Internet hosting (a service that connects your site to the internet)
Although hosting and a domain name are not free, the WordPress platform itself is. Even yet, the total monthly expense of $3 to $5 is still less than the price of a coffee.
Having your own domain name is preferable than using a free domain that belongs to someone else if you want to appear professional (for example, yourbusiness.my-free-website.com.)
Additionally, a good hosting provider will assist you ensure that your website loads swiftly and without interruption (very important for everyone who visits your pages.)
Where do I get a domain name and hosting?
For myself and my own web development projects, I mostly use www.Bluehost.com as my domain registration and web hosting provider.
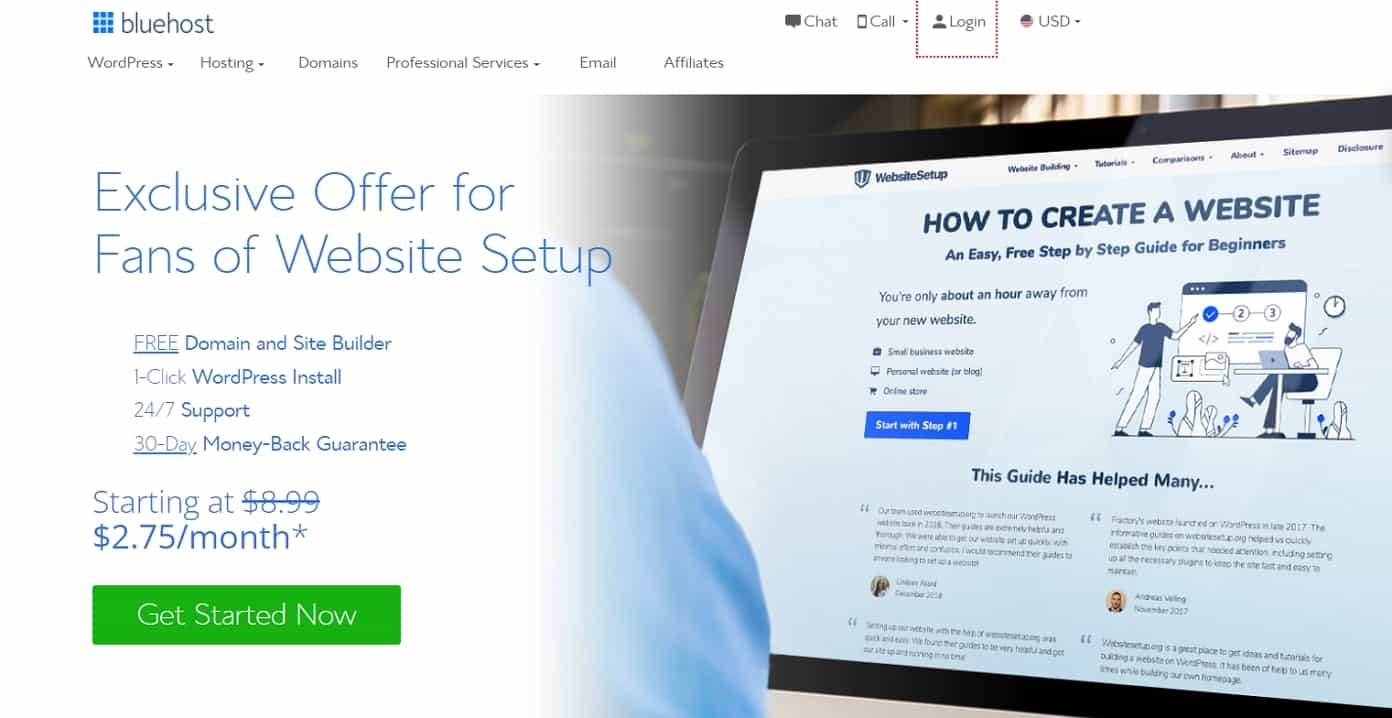
They include a FREE domain name with their website hosting, which costs $2.75 monthly less than the price of a movie ticket (a nice perk to have).
Of course, you may test various web hosts or even host your website yourself, but doing so is a very difficult procedure and frequently won’t be able to adequately serve your website visitors. So spend less money and get a reputable web server.
You may also acquire a professional email address with your own domain name, such as yourname@YourWebsite.com. This is far more professional than a generic Yahoo or Gmail address, especially if you require many email addresses.
Have a domain and hosting already? Skip step 2 and go to step 3, where I’ll describe how to establish.
What kind of domain name should I pick?
Following a few guidelines will help you choose the perfect domain name:
When creating a website for your business, be sure the domain name is the same as the name of the enterprise. YourCompanyName.com, as an illustration
YourName.com might be a fantastic alternative if you’re thinking about creating a personal website for yourself.
WebsiteSetup.org was my choice for this site (WebsiteSetup).
Usually, domain names conclude with .com, .org, or.net; however, a vast variety of domain extensions the last component of a web address, such as.com or.org have emerged recently, ranging from .blog to .party.
What would be the best course of action for you? Avoid using strange extensions; instead, use .com, .net, or.org unless they perfectly define your website; even then, it is typically preferable to use these.
Click HERE to get the Book…
Any additional tips for choosing my domain name?
You can use the following factors to aid in selecting your domain name:
1. Can it be branded? For instance, if you’re creating a website on poetry, poetryacademy.com or poetryfall.com are significantly better options than best-poetry-website.net.
2. Is it enduring? Domain names with these characteristics are significantly simpler to remember. Visitors may forget your domain name if it is hazy, lengthy, or spelt oddly.
3. Is it memorable? You want a domain name that is easy to remember, accurately expresses who you are (or what your firm does), and glides off the tongue. Considering that there are already more than 200 million active domain names worldwide, coming up with a catchy name might be challenging, but don’t give up.
When choosing a domain name, there is one general principle that always holds true: go for it.
Step #3: Set Up a Website and Start Designing
1. Setup a WordPress website
There are two methods for installing WordPress, one of which is MUCH simpler than the other.
1. USE ONE-CLICK-INSTALLATION WITH WORDPRESS TO CREATE A WEBSITE:
Nowadays, almost all reputable and well-known site hosting companies offer one-click WordPress installation.
You should be able to access your “one-click installation” during the account setup process or in the account management panel if you decide to join up with Bluehost or any other hosting provider of a same nature.
For instance, you must carry out the following actions to install WordPress on Bluehost (the procedure is nearly same or possibly the same on all of the most well-liked web hosting providers):
- Visit Bluehost.com.
- Select a hosting package (the cheapest plan is fine)
- Put your existing domain there if you have one.
- Enter your details and pick your hosting duration (you can remove the “Extras”).
- Complete the payment procedure and register for an account.
- Use “one-click WordPress install” to install WordPress after logging into Bluehost.
2. MANUAL INSTALL (if there isn’t a simple method to implement it with your web hosting provider)
If for some strange reason you are unable to install WordPress instantly (certain hosting providers do not offer one-click installation), see the manual installation method below:
Manual WordPress Installation (Click to expand)
2. Choose a Theme for Your Site (Free or Premium)
The use and customization of WordPress themes will be the focus of the following stage.
WordPress themes are design templates that provide quick and simple changes to your site’s appearance.
Fortunately, there are a ton of themes available for WordPress. There are more than 8,000 free themes in the official WordPress theme directory alone.
Themes may be accessed straight from WordPress without visiting an other website.
Simply navigate to Appearance > Themes and select Add New Theme by clicking the prominent + icon.
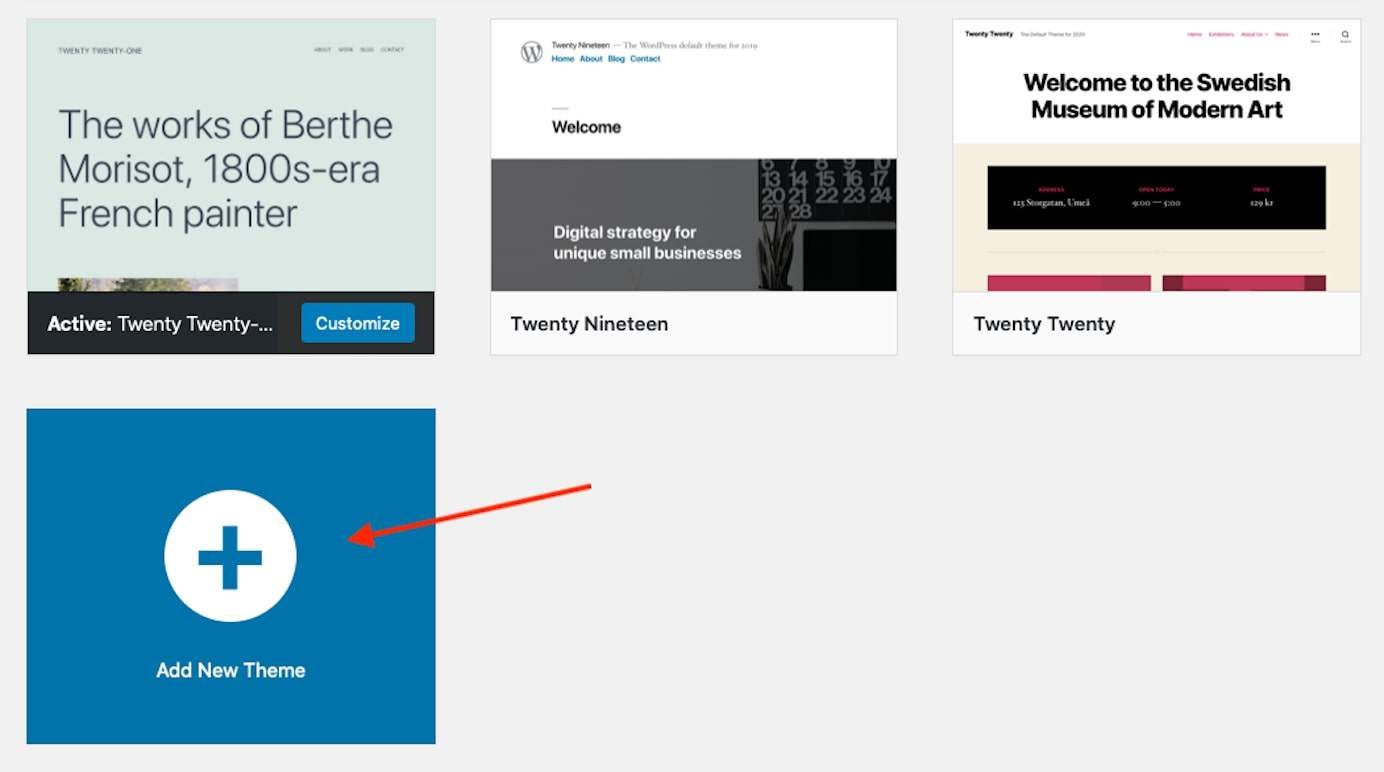
Then use the search bar to find a theme that suits your site.
Any theme shown may be selected to watch a demo and read more about it on the Details & Preview screen.
Install a theme after finding one you like by selecting Install from the Details & Preview box.
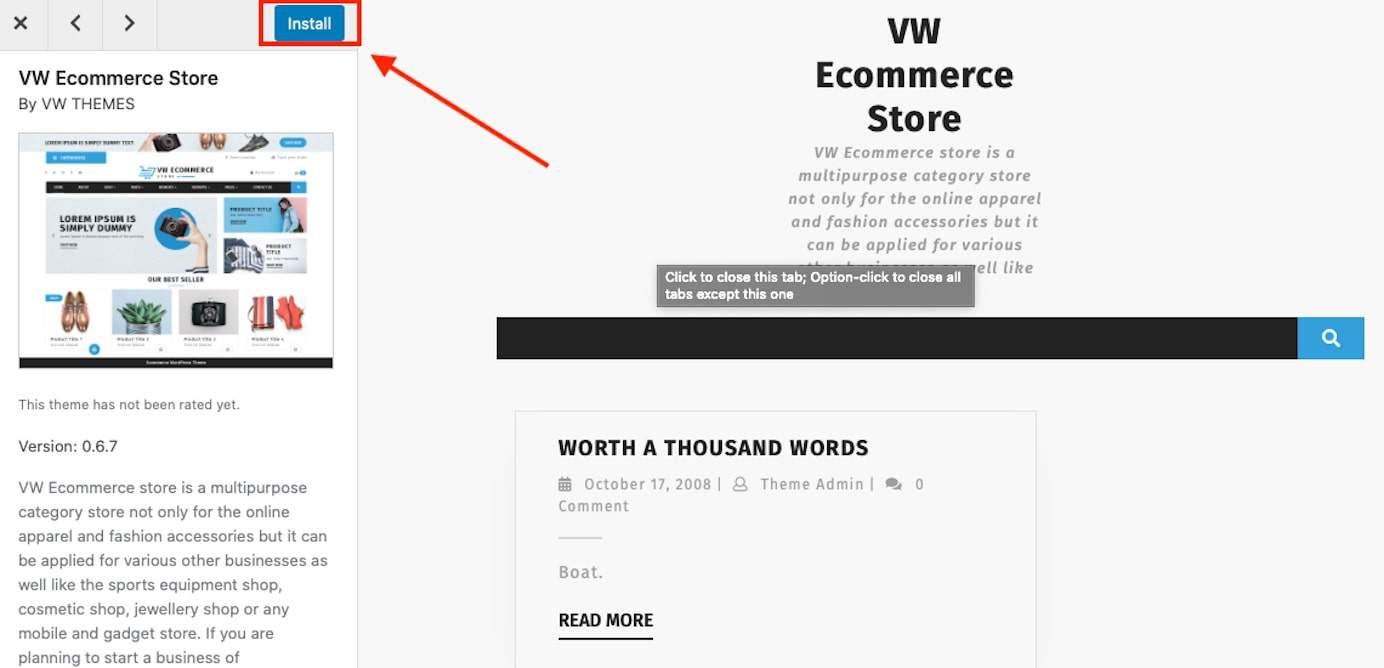
Click the Activate button that appears in place of the Install button after the installation procedure is finished.
If the options in the default theme directory are insufficient for your needs, go into paid theme markets like:
3. Add Content (Pages and Posts)
You must have content on your website before you can customize it.
Since there is nothing on your website to display the changes, it is difficult to personalize it. Depending on the purpose of your site and the material you require, your needs will change.
However, there are a few important pages that almost all websites have:
- Homepage
- About page
- Contact page
Consider what information would be most beneficial to your visitors when choosing which pages to include. You must also consider visual material, such as images.
Some WordPress themes include page templates for particular page kinds to make things simpler. Additionally, some offer many page layout options.
To take advantage of these, go to Appearance > Customize.
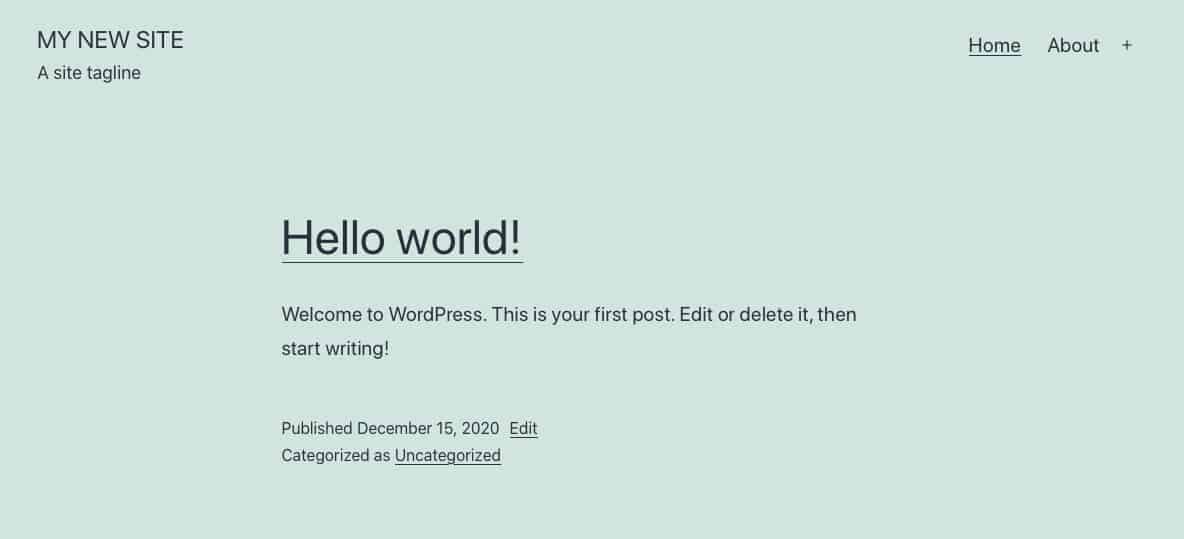
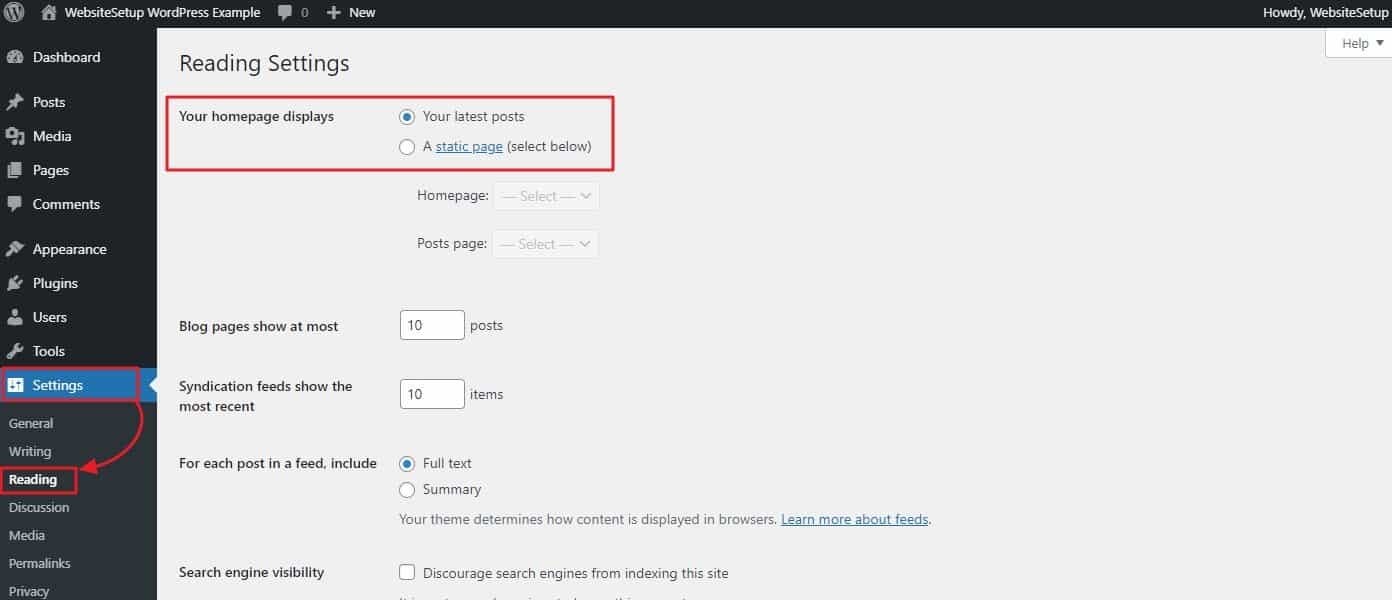
In this example, we’re building a website using the most recent Twenty Twenty-One WordPress default theme. It utilizes a static page as the homepage by default, which you can change under the Homepage Settings. Choose the page you wish to use as your website’s home page using the dropdown menu.

Alternatively, if you want your homepage to feature your latest blog posts, check and choose the option Your latest posts.
Confirm your choices by clicking Publish in the upper left corner.
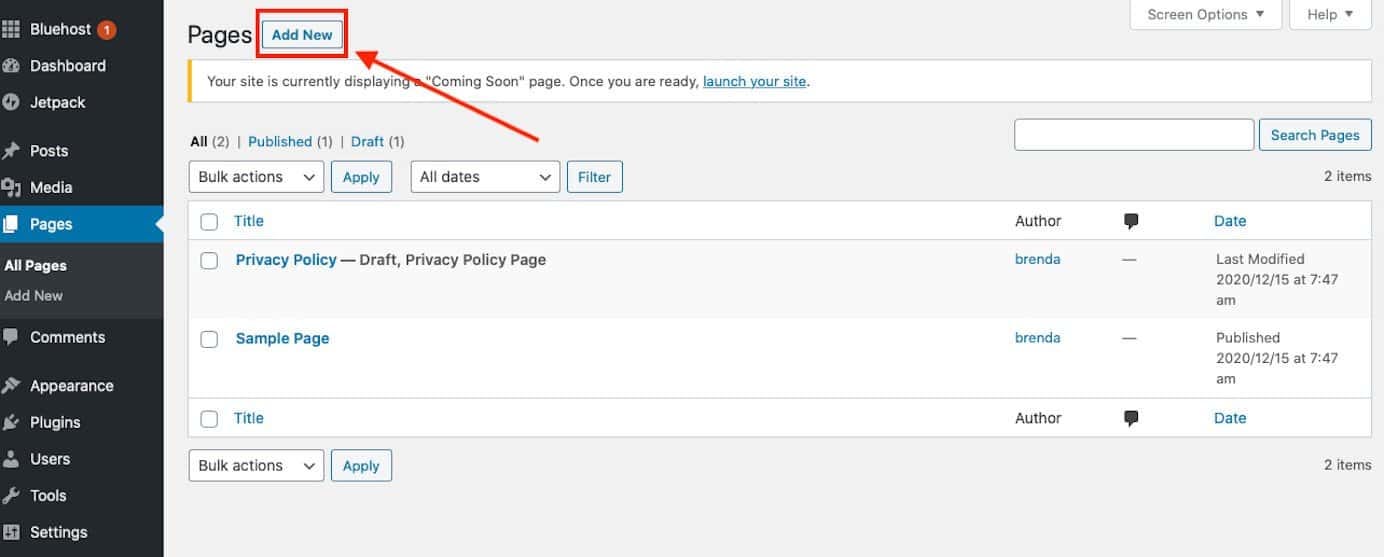
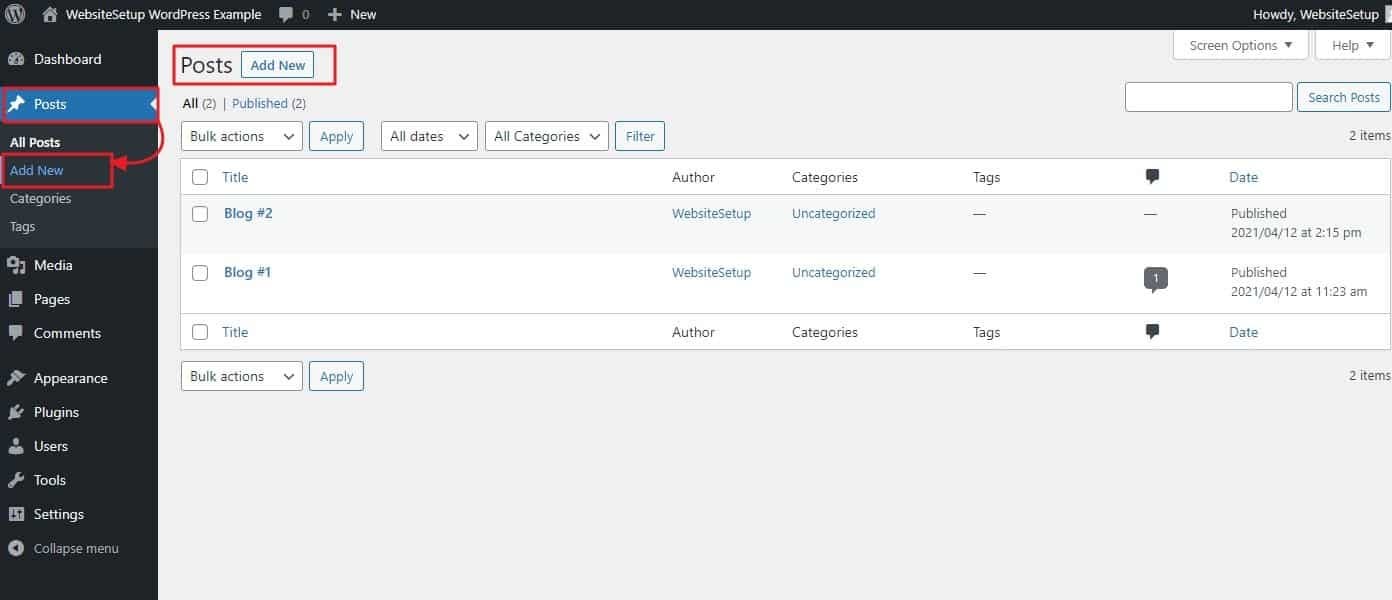
After that, you can move on to creating new pages for your site. For that, in the main dashboard, go to Pages > Add New.
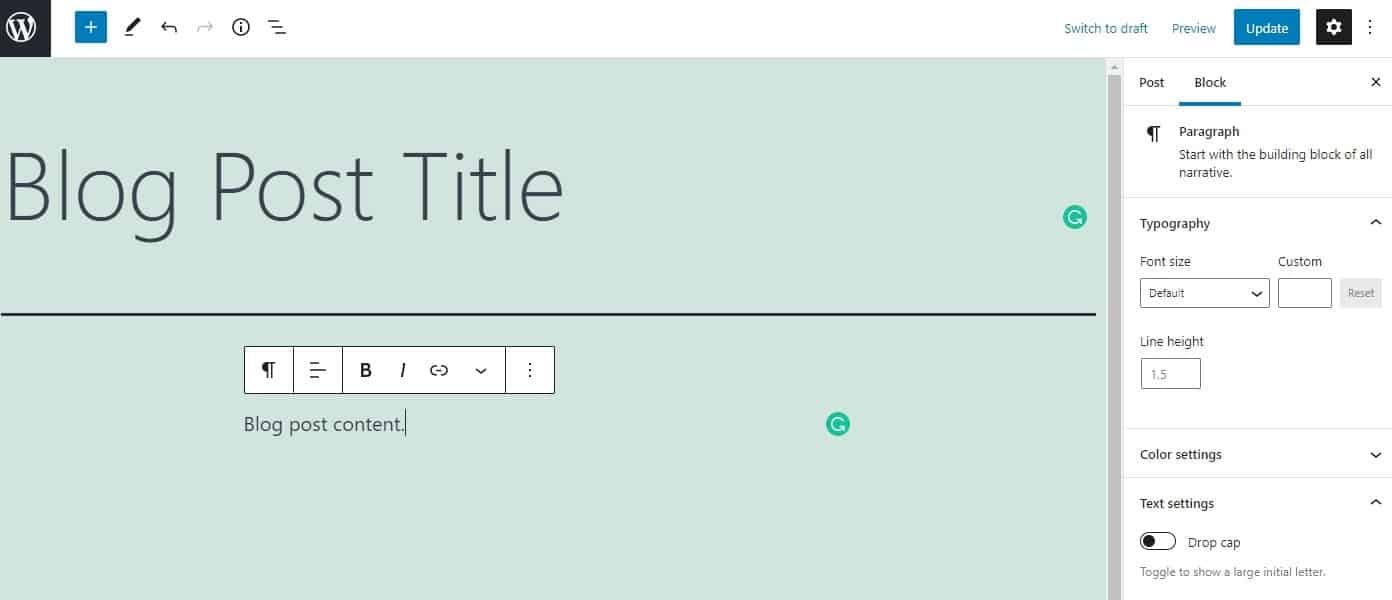
The Twenty Twenty-One theme relies on the Gutenberg editor, so here I can add page titles and content.
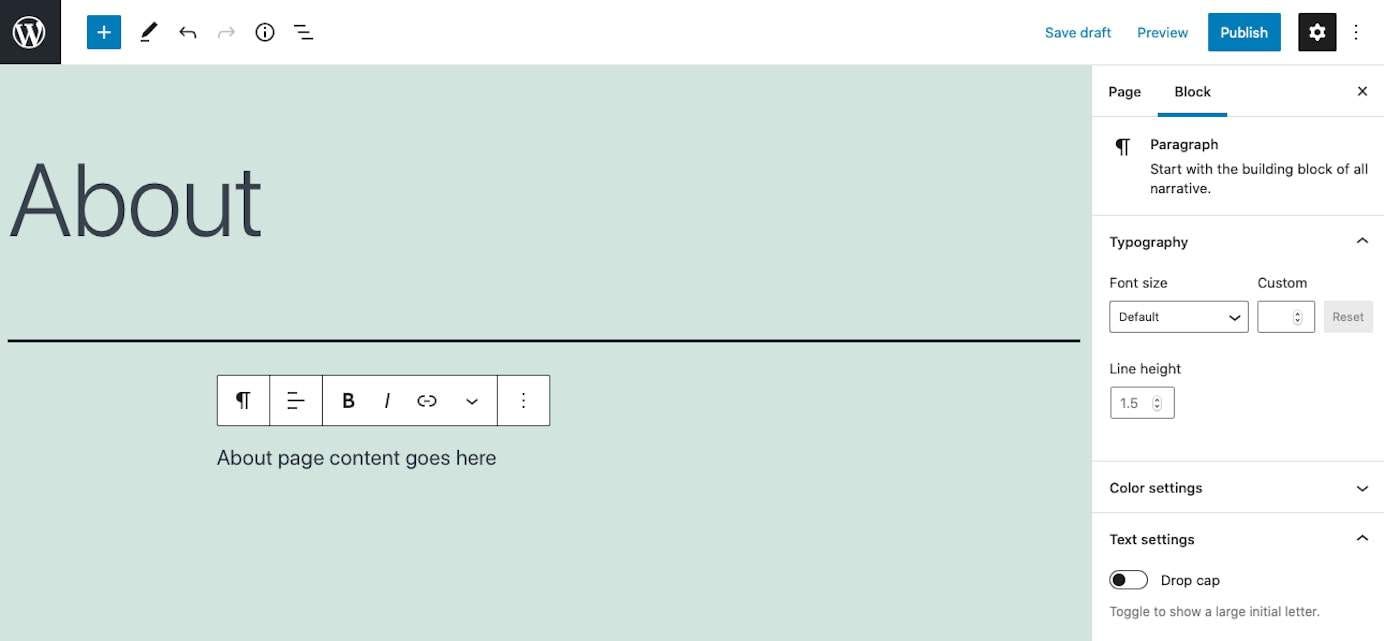
Within this page, you can add features like images and formatting.
Repeat this process to add additional pages to your site.
4. Make Sure Your Website is Well-Organized
Consider the website you have as a library.
The more material you add to your website, the more crucial your website structure will be.
Learn how to organize your website so that it makes sense to your visitors and is simple for them to navigate while learning how to build a website.
The navigation menu is a key component in this. Once you’ve finished creating some pages, it’s time to make them accessible to site visitors. You can do that under Appearance > Menus.
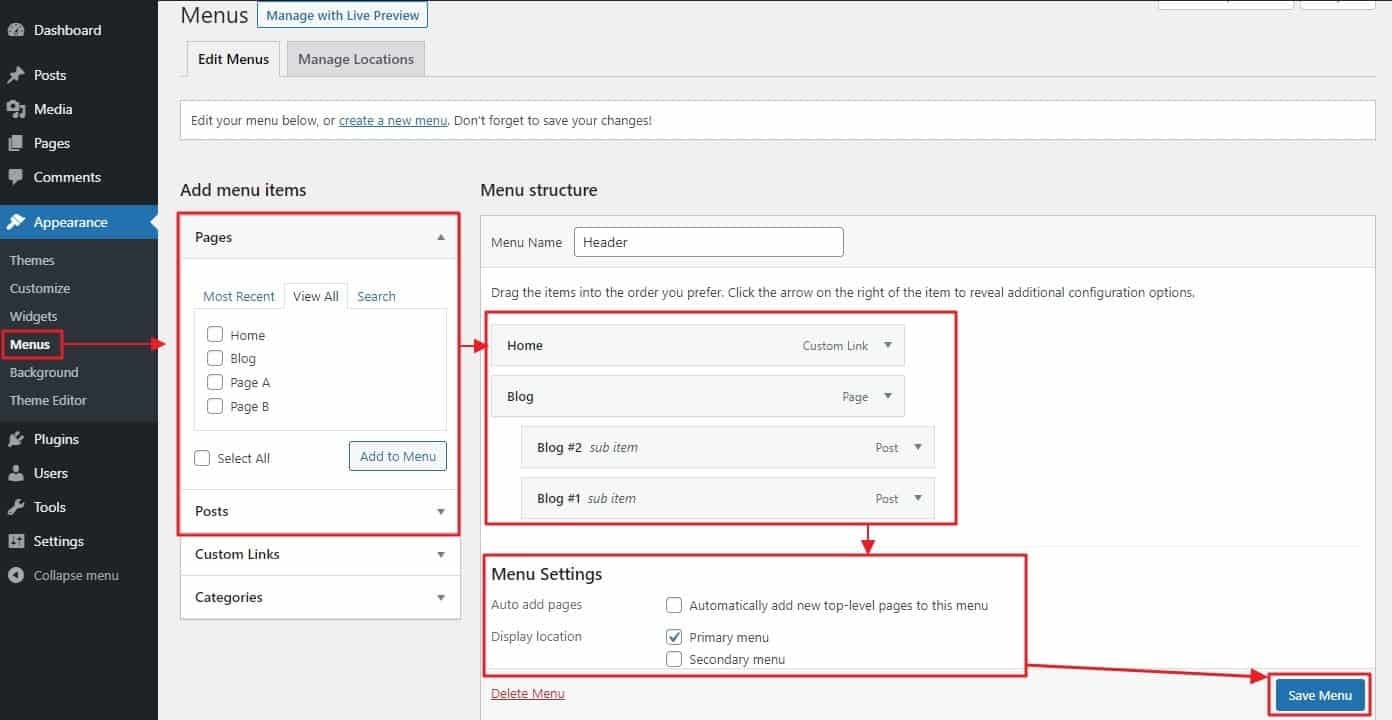
The first step here is to give your new menu a name, then click Create Menu.
After that, you can choose which content to add to it on the left. For example, tick the boxes next to pages you want to appear in the menu, then click Add to Menu.
You can drag and drop menu items to your desired order and even turn them into sub-items by moving them underneath others like below. Once you are satisfied, choose the menu position where you’d like this menu to appear (in this case Primary menu).
Click Save Menu again and go to your site’s front end to see the new menu in action.
Ultimately, you want to reflect a structure that makes sense for your site and helps visitors get to where they need to go.
Click HERE to get the Book…
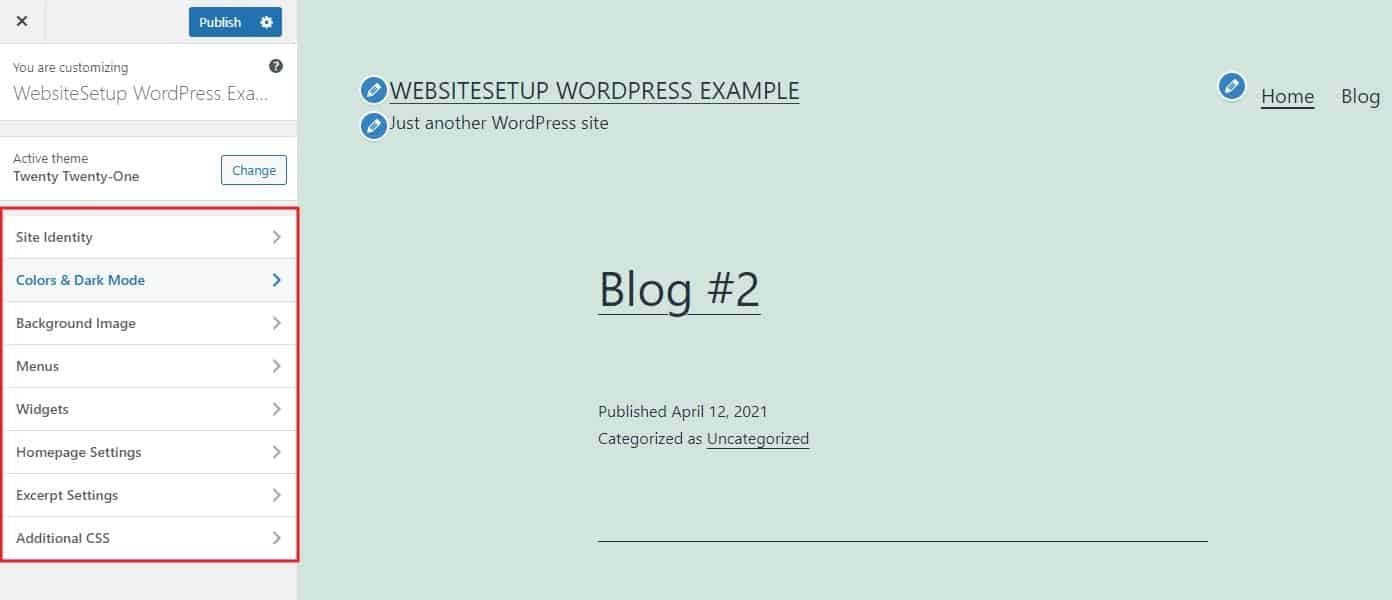
5. Additional Customization Options
For additional customization options, go back to Appearance > Customize. When you look around, you will see that it offers a lot more options to make changes to your site. You are able to modify other parts of your site like:
- Title and tagline
- Colors
- Typography
- Background image
- Menus
- Widgets
You can also make adjustments to your homepage, blog page, and add custom code. The options that appear will vary depending on which theme you’ve installed.
Beyond theme customization, there are many plugins available for WordPress, both free and premium. In the official WordPress plugin directory alone, you can find close to 60,000 plugins that can add all kinds of new features and functionality to your site. Plus, there are many more available from third-party marketplaces.
To install new plugins, navigate to Plugins > Add New.
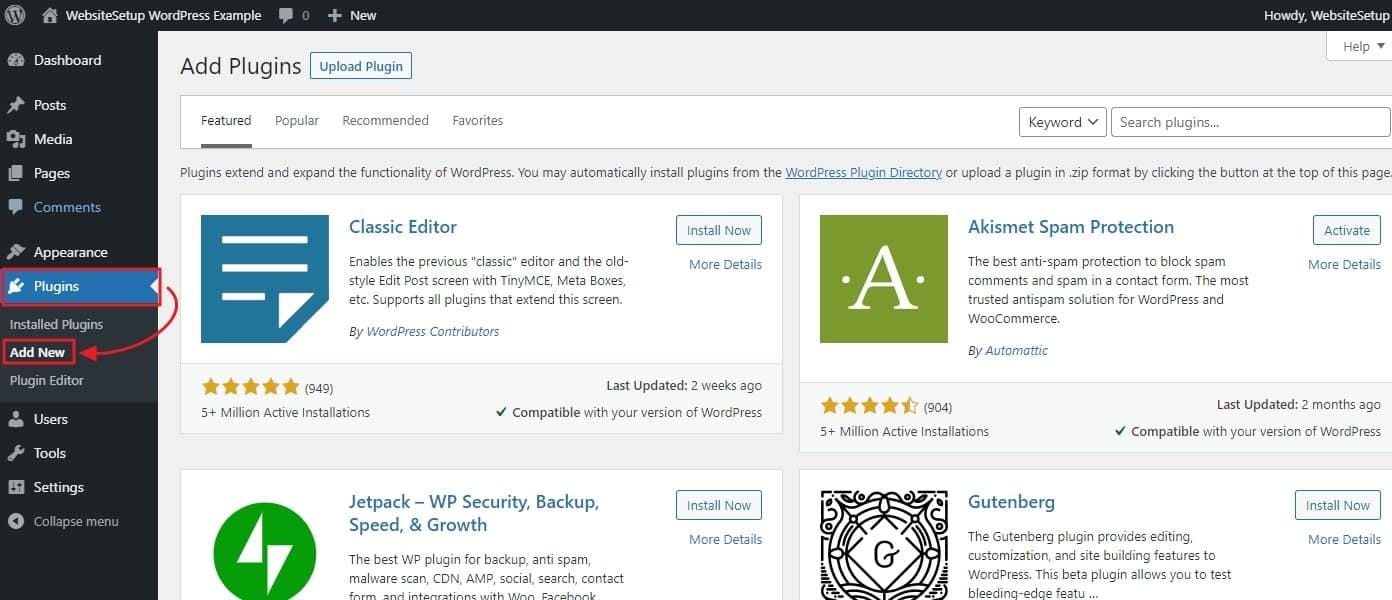
You’ll be presented with a list of some of the most popular plugins currently available. Use the search field to find anything else you are looking for.
To get plugins onto your site, hit the Install Now button. Wait until it has been downloaded and then click Activate. You can find all plugins on your site plus the possibility to activate, deactivate, and delete them under Plugins in the WordPress main menu.
As to what plugins you should install, some choices worth considering include:
- Yoast SEO — A top search engine optimization plugin that adds on-page optimization prompts to every page and post plus the option to customize Open Graph social media tags.
- Jetpack — Includes a wide range of features to improve website speed, optimization, social media integration, digital marketing, contact forms, and site search.
- Smush — This plugin compresses images that are uploaded to WordPress, which saves storage space, and speeds up page load times.
- WooCommerce — This is the most popular e-commerce store plugin for WordPress and makes it easy to set up an online store. More on it further below.
- MonsterInsights — This plugin adds Google Analytics to your WordPress dashboard.
If you want even more control over how your website looks, you can install a page builder plugin. These plugins add drag-and-drop functionality to your site, which means you can visually build entire web designs — not just individual pages and posts. A few popular choices include:
- Elementor — This all-in-one website builder offers visual website editing, fast load times, and a vast selection of templates to choose from.
- Divi — Developed by Elegant Themes, Divi provides another straightforward way to customize websites.
- Beaver Builder — An easy-to-use page builder plugin that speeds up website design considerably.
6. Add a Blog (Optional)
Not every website needs a blog. However, creating one can be a good idea to regularly publish fresh content, display your expertise, and provide additional value for your visitors.
To add a blog in WordPress, you first have to select a blog page. Above, I have already covered that you can configure your homepage to automatically display your latest posts. However, if you want a dedicated blog page instead and keep your homepage static, you first need to create it.
This is as simple as setting up an empty page (Pages > Add New), naming it Blog (or whatever you want but Blog makes sense because it will automatically create the address yoursite.com/blog for your blog page), and publishing it. Then, pick it as your Posts Page either under Appearance > Customize > Homepage Settings or under Settings > Reading.
When saved, all blog posts will automatically appear on your chosen page. Don’t forget to add it to your navigation menu!
To add blog posts to your website go to Posts > Add New.
This will get you to the same content editor that you used earlier for your pages. Add a title and content to your blog post. Include images and formatting, headers, lists, and anything else it needs. In the sidebar on the right, you also find options to apply categories and tags, define an excerpt and set up a featured image.
Once you’re done making changes, click Publish. Your first post is completed, well done!
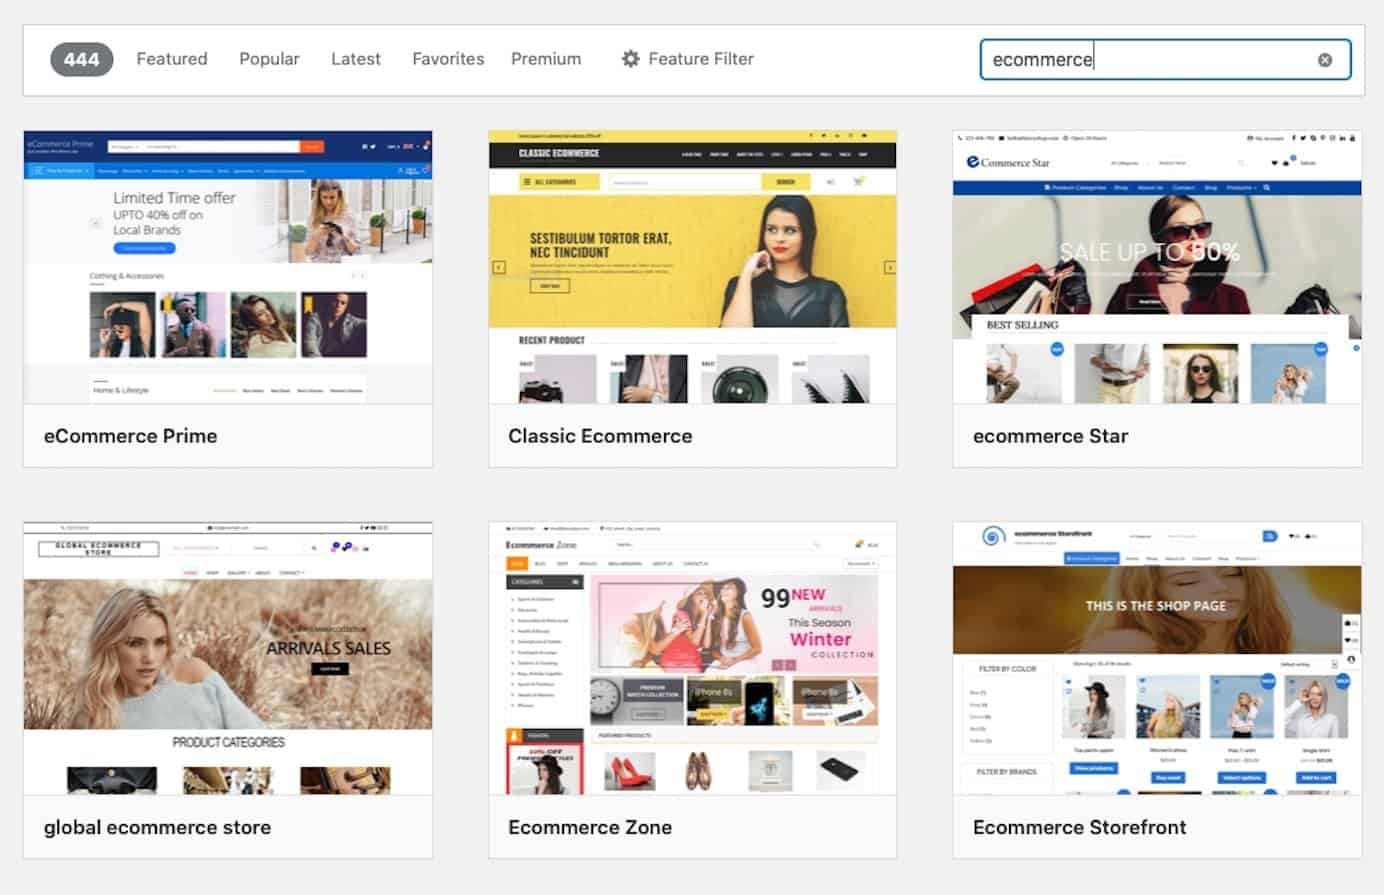
7. Adding an Online Store (Optional)
Not every website needs an eCommerce store. But if you want to know how to make a website that includes an online store, then here are two popular options.
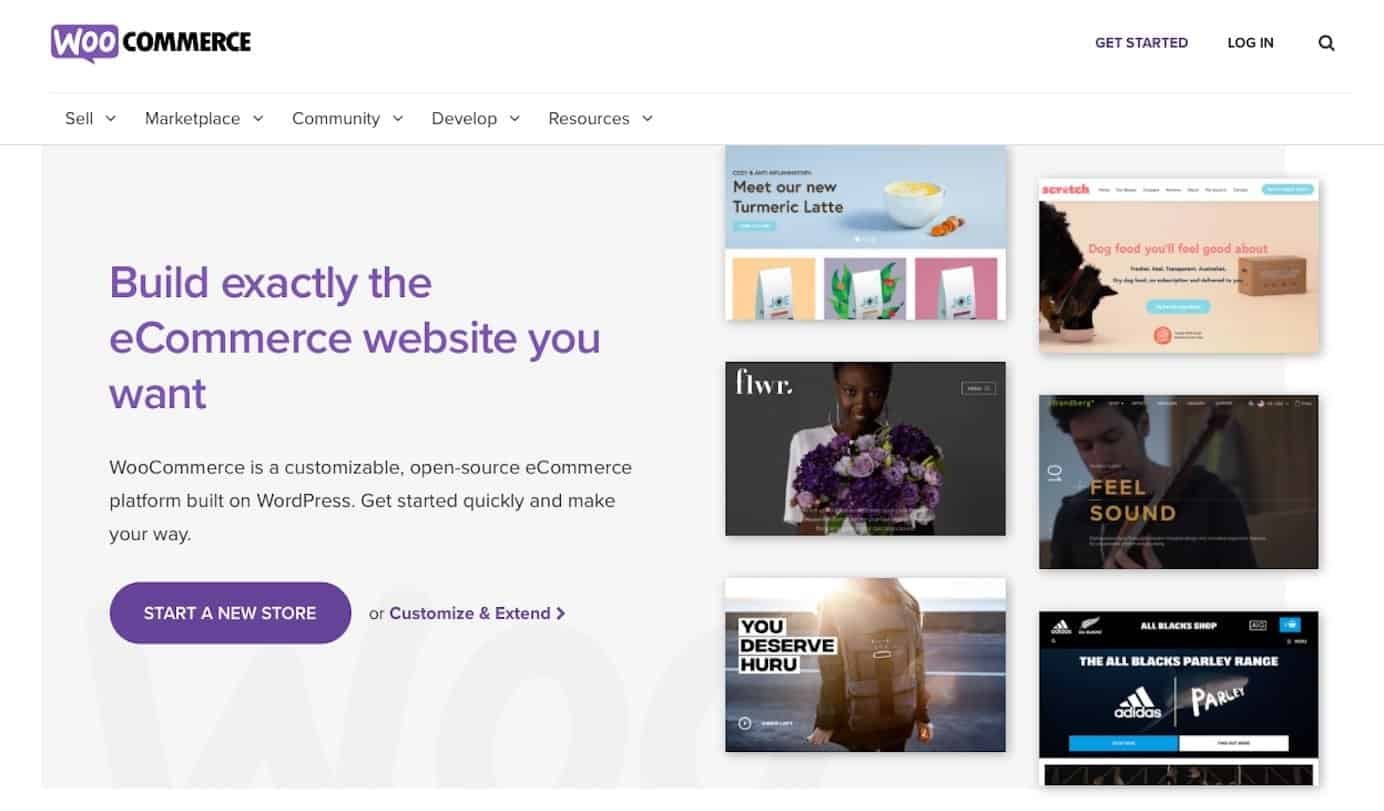
With WordPress the most popular plugin for this purpose is WooCommerce.
You can set it up quickly, it offers many payment options, and a wide range of optimized themes to create an online shop. Plus, it has a variety of extensions available for purchase to customize your e-commerce site and adapt it to many purposes.
To learn how to add an online store to your website, follow this guide.
Outside of WordPress, the most popular option is Shopify.
Shopify is a self-standing online store builder where you get all website aspects as a package. That means that you get hosting, domain name and website builder all from just one package deal.
Shopify is the most popular online store builder in the market and for good reason. They offer an intuitive builder with loads of themes and customization options.
If you want to see a more detailed tutorial on how to build an online store with Shopify you can follow our guide.
Click HERE to get the Book…
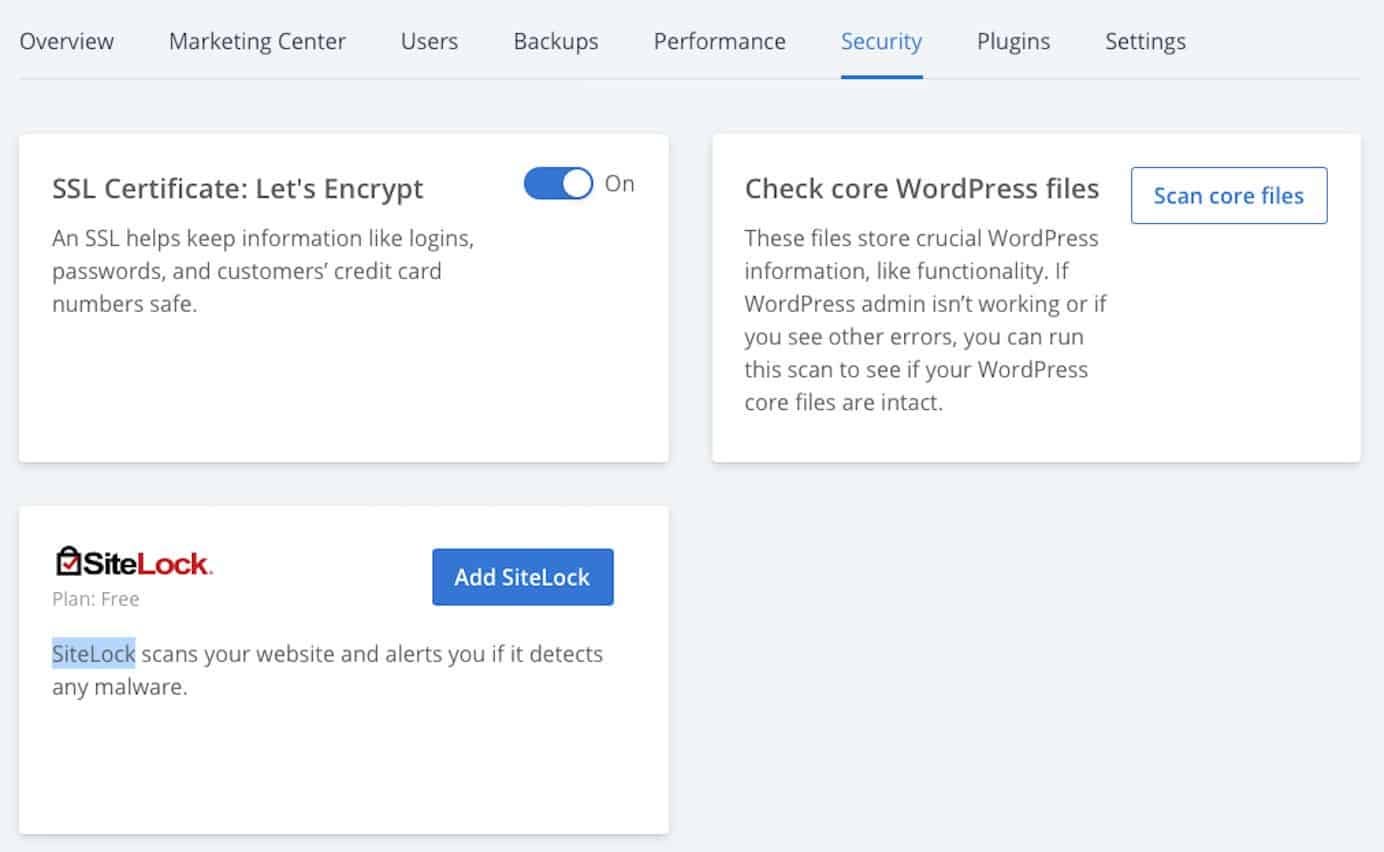
8. Configure SSL
A secure sockets layer (SSL) on your website means data sent to your website’s visitors is kept secure. SSL is an important search ranking factor, and it’s essential to ensure a positive user experience by prioritizing user privacy and security.
To check that SSL is active on your new website with Bluehost, do the following:
- Log into Bluehost.
- Go to My Sites.
- Click Manage Site.
- Find the Security tab on the next screen.
- Under the section that says Security Certificate, verify your Free SSL Certificate or SSL Certificate: Let’s Encrypt status. The toggle should be switched to On.
- Verify SSL is set up by visiting your site again. A lock icon should appear next to the domain name in your web browser’s address bar.
9. Launch Your WordPress Website
Once your site is ready, it’s time to officially launch it. Make sure to double-check your settings and proofread your posts and pages one more time. If everything looks good, click the link at the top of the dashboard that says Coming Soon Active.
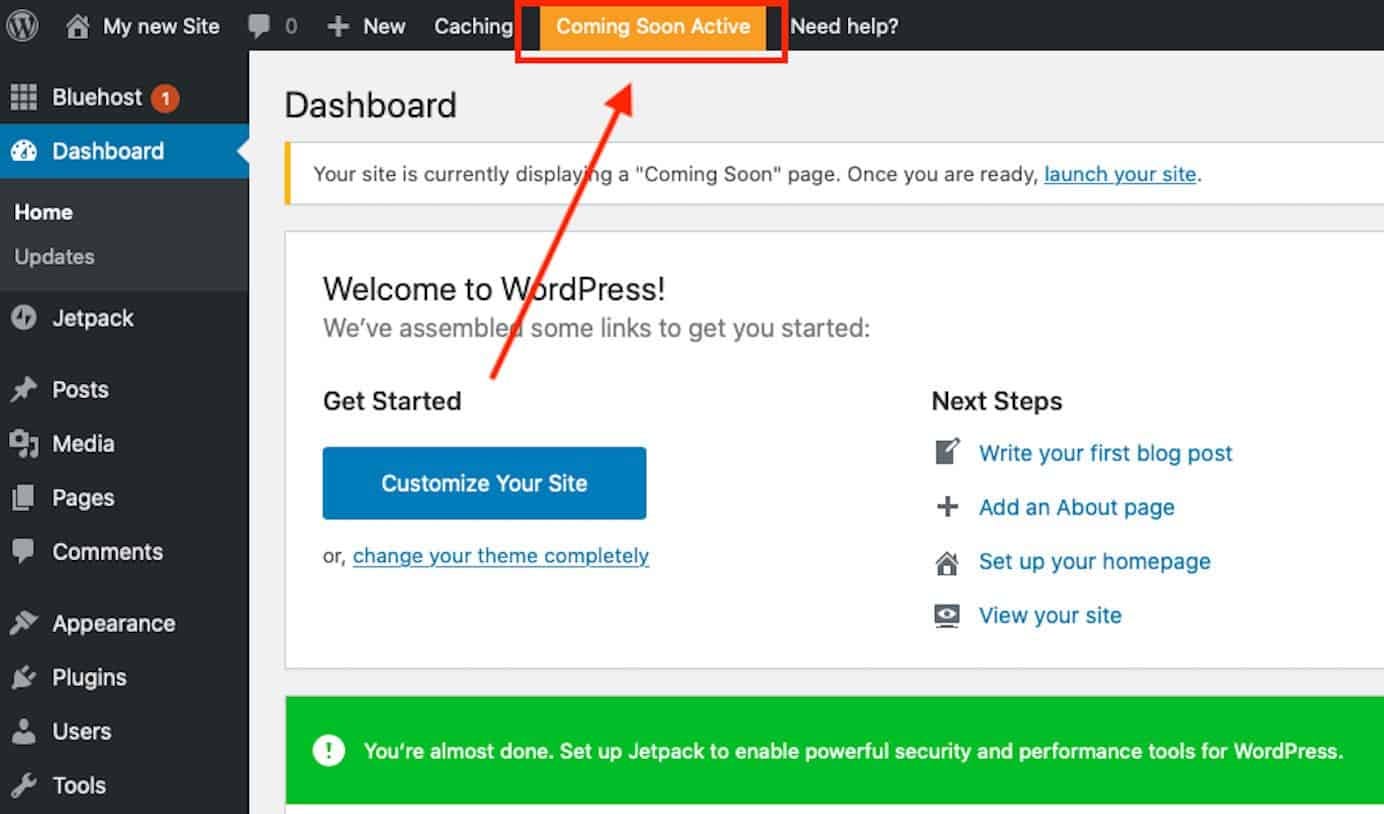
After that, scroll down and hit the button that says Launch your site.

Now you can check your live website.

Click through each page to make sure all links work, your text looks good, and your images are formatted properly (you can use this checklist for reference).
Congratulations! You’re now the proud owner of a new website.
Even with a thorough manual to guide you, learning how to create a website is no easy task.
The acquisition of a new talent and the realization that your efforts are beginning to pay off may, nevertheless, be incredibly fulfilling.
Don’t stop there though. Utilize what you’ve learned to develop more intricate features and functions. This can help you create the website you desire, rather than merely learning how to design one.
And if you want to learn more about making website, Click HERE…
Click HERE to get the Book…


No comments:
Post a Comment